 ------------------------------------------------------------------------------
------------------------------------------------------------------------------
------------------------------------------------------------------------------This tutorial was written with a knowledge of PSP.
Any similarities to any other tutorial are purely accidental and not intentional.
Please do not copy or post on another site without permission.
Tube of choice: However I am using Lia
Her work is currently FTU - Visit her website HERE
Template: Naughty or Nice Temp by Jenny @ Creative Misfits Blog
Visit there blog - HERE
Kit: Peppermint Wishes by Sarah's Tags n Things
Visit her blog HERE for Purchase detail
Font - Dr Carbfred
I've had this temp for a pretty long time. So not sure if it's still available or not.
Open temp and Control D to duplicate the image
Change the canvas size to 900 x 900, I like to have a lot of extra room and will re-size later
Now we are going to be deleting a lot from the temp.
Let's delete the following layer: Text background; Text; Snowflakes & Copyright
Activate Rectangle Frame Red
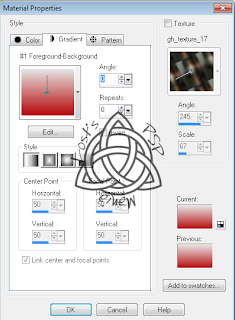
Change Foreground to #b60708 and Background to #e6e6e6
Create Gradient using the following number

Insert a new layer and flood fill it with gradient you just created
Now delete the Rectangle Frame Red layer
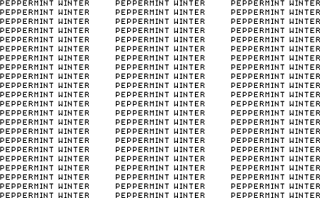
Delete BG Text. There are a couple of ways to create text fills, however my plugins don't work so I made it the old fashion way.
Replace the Naughty n Nice word fill with the Pepper Winter one below

Right click and save this image
Merge layer down so it gets the soft light look
***Remember to save often***
Open paper 6
Activate Right Frame layer, copy and paste Paper 6, invert and delete
Delete Original Right frame layer and merge the new layer to the old layer
Now repeat with Left Frame layer
Open tube of choice.
Copy and paste as a new layer
I re-sized by 75% to get the girl a little smaller.
Activate Right Frame
Copy and paste tube; invert and delete
Change blend mode to screen
Repeat with Left frame, you will have to flip the tube
***Remember to save often***
Now time to add elements of choice
Open element 40
Activate Raster Layer 1 (the one below the pixel text)
Copy and paste as a new layer, invert and delete
Open Element 13, re-size by 50%
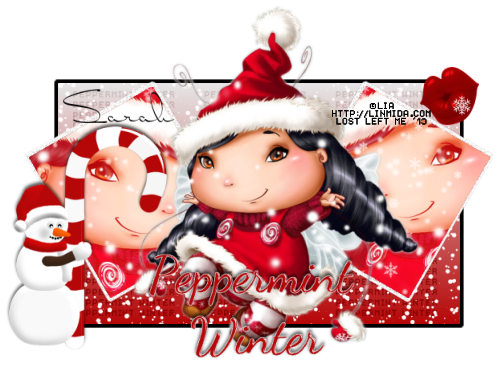
Copy and paste as a new layer, use my tag for placement
Open element 15, re-size by 25%
Copy and paste as a new layer, use my tag for placement
Open element 31, re-size by 50%
Copy and paste as a new layer, use my tag for placement
***Remember to save often***
Crop the image around tag. Make sure it's not longer than 650 on the longest side
Now add your copyright
Add anything else you would like
Save image as a png file.
All links were active at time of posting.
I would love to see your finished work.
Email: lostdarkangel13@gmail.com
If any problems arise please contact me, thanks again.


No comments:
Post a Comment