------------------------------------------------------------------------------
------------------------------------------------------------------------------
This tutorial was written with a knowlege of PSP.
Any similarities to any other tutorial are purely accidental and not intentional.
Please do not copy or post on another site without permission.
------------------------------------------------------------------------------
------------------------------------------------------------------------------
Supplies Needed:
Tube of choice: However I am using Elias Chatzoudis
Please DO NOT use without a proper License
Visit PTE - HERE, to purchase
Template: Ella's Easter Temp 4 from the Misfit Blog
Visit their blog - HERE
Kit: Easter Eggs by Scrappin Krazy Designs
Vist her blog HERE for Puchase detail
Font - CluKennedySH
Plugins - Gradient Glow
------------------------------------------------------------------------------
------------------------------------------------------------------------------
Open template, Shift D, Close orginal
We are going to change the canvas size, I prefer working with a lot of room. We will re-size later.
Go to Image, Canvas size, change it to 900 x 900
Ok, now we are ready.
Remember to save your work as a psd file through out. This will allow you to start back there with the layers in tact if your PSP should close.
Hide the eggs that are in the temp, we are going to replace those with the kit ones a little later.
Highlight Bg 1 layer
Open p14, copy and paste as a new layer, invert and delete, select none and merge down
Highlight Bg3 layer
Open p06, resize by 50%, copy and paste as a new layer, reposition to your liking, invert and delete, select none and merge down
Highlight Bg 2 layer
Open 04, copy and paste as a new layer, invert and delete, select none and merge down
Highlight Easter WA layer
Open p05, resize to 700 x 700, copy and paste as a new layer, reposition to your liking, invert and delete, select none and merge down
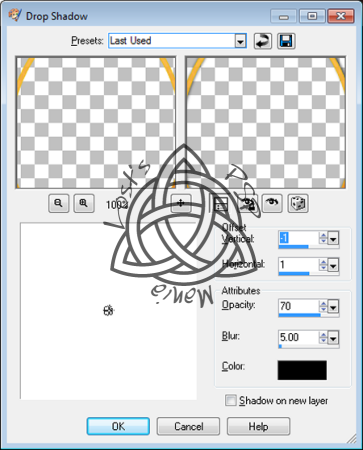
Now lets take a moment to apply a little Drop shadow to a few layers.
Using the following settings, apply a drop shadow to Frame 3, Frame 2, Frame 1 & WA BG layers

Now add your tube of choice, place it below the wordart layer
Now duplicate your tube and more the copy above the wordart layer
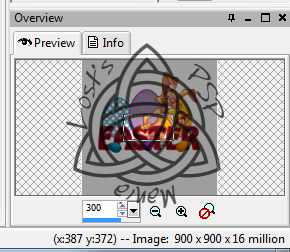
Now you might want to increase the size of your picture so that you can see the very small details
Below will show the overview size of 300

Using your earser at 5, trace the outline of your tube
Once you have done this you can increase the earser size and delete any other portion of the tube that is blocking the wordart
What you want is the main part of the tube behind the wordart with only the hands in front, use my tag as an example
Now open 3 eggs of your choice
Re-size each by 65%, then copy and paste one at a time
We are going to replace you template eggs with these, delete the other ones
Open ele 23 and place it below your tube, using my tag as an example
Open ele 32, copy and paste as a new layer, mirror and move to your liking
Apply a drop shawdow using the settings above.
Open ele 09, copy and paste as a new layer, move to very bottom
Apply any other element of your chosing.
When done, crop your image and then re-size so that the longest side is less that 700
Now add your copyright
Save image as a png file.
------------------------------------------------------------------------------
------------------------------------------------------------------------------
This tut was written on April 7, 2012
All links were active at time of posting.
I would love to see your finished work.
Email: lostdarkangel13@gmail.com
If any problems arise please contact me, thanks again.
------------------------------------------------------------------------------
------------------------------------------------------------------------------
*************************************************


No comments:
Post a Comment