Monday, August 24, 2015

Warning.

HELLO!!!!!!!!!!!!!!!

Good Morning Blog Walkers.

I know some of you are just as shocked as I am about this blog. I can't believe it is still here.
My plan in the next couple of weeks is to have it back up and running fully along with new stuff. Not sure how this is going to work. But I will try at least. 

All of my links are not working so I will have to re-upload them and get them all straight. So again please bare with me.

Thanks again,
Lost

Saturday, November 30, 2013

~ Under Construction ~

Hello to all my lovely stalkers.
I know it's been a long time since I was here.
A lot has happened.
After a lot of thought, I won't be deleting this blog.
That being said, I'm trying to redo it.
So please bare with me, it's going to look funky until I get it finished :)

Wednesday, April 10, 2013

:||: PTU TUT - Spring-Cited :||:


------------------------------------------------------------------------------
------------------------------------------------------------------------------
For full size click the above tag.
This tutorial was written with a knowledge of PSP.
Any similarities to any other tutorial are purely accidental and not intentional.
Please do not copy or post on another site without permission.
------------------------------------------------------------------------------
------------------------------------------------------------------------------
Supplies Needed:

Kit - Egg-cited for Easter by Disyas Digitals Designs
You can purchased this kit at The Scrappin Box 

Font - Ventography Personal Use Only
------------------------------------------------------------------------------
------------------------------------------------------------------------------
We are going to do something a little different with this one.
I will be using the kit and kit only.
We will be taking and changing a few thing to make an image/scene.
Going to be a bit different from what we are use to, be we can do it. 
So ready, let's get started

***Remember to save often***

Open Frame 9, Shift D to duplicate, change the name of the layer in the layer's list, close original

Change canvas size to 800 x 800, we will re-size later

Using your magic wand, click inside the frame; Selections-Modify-Expand-5

Open Paper2, re-size by 50%, copy and paste as a new layer, invert and delete, rename it background

Now open E10, copy and paste it as a new layer, place this layer below the frame

If you duplicated the layer, it will give it a darker look, so lets do that and merge the two together, changing the name of this to curtains

Using your eraser, earse the portion of the curtian that stick out and doesn't seem to look quiet right.

My curtains didn't cover the entrie window like I wanted so I duplicated and flipped

Using the eraser to get rid of anything I didn't like, then merged the two together, making only 1 curtain layer

Open E8, copy and past it as a new layer

Postiion it a littl to the left, use my tag as example of placement, rename it Fence

***Remember to save often***

Open MarySunshine6, copy and paste as a new layer

Mirror her so she looks like the girl in my tag

Open E58, re-size by 25%

Copy and paste as a new layer, I placed mine on the girls head so it would look sort of like a headband

Open E30, re-size by 50%, copy and paste as a new layer, use my tag for placement

Open E32, re-size by 50%, copy and paste as a new layer, use my tag for placement

Open E43, re-size by 25%, copy and paste as a new layer, use my tag for placement

I used E128 to create a mask sort of

Copy and paste as a new layer, move it so that it's the bottom layer, adjust it until your happy with the stars

Crop the image

Re-size total image so that it's no longer than 650 on it's longest side
------------------------------------------------------------------------------
------------------------------------------------------------------------------
Now add your copyright

Add anything else you would like

Save image as a png file.
------------------------------------------------------------------------------
------------------------------------------------------------------------------
This tut was written on April 10, 2013
All links were active at time of posting.
I would love to see your finished work. 
Email: lostdarkangel13@gmail.com
If any problems arise please contact me, thanks again.
------------------------------------------------------------------------------
------------------------------------------------------------------------------

Thursday, March 28, 2013

:||: FTU TUT - Easter Bunny :||:


------------------------------------------------------------------------------
------------------------------------------------------------------------------
For full size click the above tag.
This tutorial was written with a knowledge of PSP.
Any similarities to any other tutorial are purely accidental and not intentional.
Please do not copy or post on another site without permission.
------------------------------------------------------------------------------
------------------------------------------------------------------------------
Supplies Needed:

Tube of choice - However I am using Bits N' Bobs
Please DO NOT use without a proper License
Visit Pics For Design HERE, to purchase

Kit By Candy's Treats
Visit her blog HERE for DL info

Font - Bunny
------------------------------------------------------------------------------
------------------------------------------------------------------------------
***Remember to save often***

Open LuvEasterCluster1, ctrl-D to duplicate

Change Canvas size to 800 x 800, I like to work with plenty of space, we will re-size later

Using your magic wand, click inside each frame, Modify, Expand by 5

Open paper 2, copy and paste as a new layer, invert and delete, select none

Move the paper below frame, hide this layer for the moment

Click inside the top frame, repeating the steps to expand before

Open tube of choice, if your not using one with a close up then your tube will work

However I'm using one with a close up

Re-size close up so that it will fit, I did mine by 50%

Copy and paste tube, invert and delete, repeat, Use my tag as an idea

Merge these two layers together then duplicate

Mirror the duplicate layer and move it down to the second frame

Once down merge two layers together and move it below the frame layer

Change Blend Mode to Hard light and Opacity to 62%, un-click the frame background layer

***Remember to save often***

Open main tube and place into middle of tag, re-size if needed

Open heatspill, re-size by 75%

Copy and paste as a new layer, duplicate, mirror and flip, merge the two layers together

Open LuvEaster4 (word-art Easter with heart and eggs), copy and paste as a new layer

Use my Tag for placement

***Remember to save often***

Add anything else you would like

Apply drop shadow to any layer of choice, I always like to give a slight one to all layers

I use:
Offset Vertical - 0
Horizontal - -1
Attributes Opacity - 70
Blur - 6.00
Color - Black

Crop your image, getting rid of all excess canvas

Re-size so that the total image is no longer than 650 on it's longest side

Now add your copyright

Save image as a png file.
------------------------------------------------------------------------------
------------------------------------------------------------------------------
This tut was written on March 26, 2013
All links were active at time of posting.
I would love to see your finished work.
Email: lostdarkangel13@gmail.com
If any problems arise please contact me, thanks again.
------------------------------------------------------------------------------
------------------------------------------------------------------------------

Sunday, March 17, 2013

:||: PTU - Degree Of Sarcasm :||:


------------------------------------------------------------------------------
------------------------------------------------------------------------------
For full size click the above tag.
This tutorial was written with a knowledge of PSP.
Any similarities to any other tutorial are purely accidental and not intentional.
Please do not copy or post on another site without permission.
------------------------------------------------------------------------------
------------------------------------------------------------------------------
Supplies Needed:

Tube of choice: However I am using an Exclusive from PFD
Please DO NOT use without a proper License
Visit their store HERE for purchase details
   
Template: Kandi's Temp 81 - Visit her blog HERE

Kit: Black & White Tagger Size Kit by Diva Designz
Visit The Store HERE To Purchase

Font - Frosting for Breakfast
------------------------------------------------------------------------------
------------------------------------------------------------------------------
***Remember to save often***

Open template, ctrl-D to duplicate, close original

Re-size canvas to 800 x 800, I like having plenty of room to work, we will re-size later

Activate right black square layer

Open paper 7, copy and paste as a new layer, invert and delete, select none and merge down

Repeat with left black square layer

Activate Blue circle 1

Open paper 3, copy and paste as a new layer, invert and delete, select none and merge down

Repeat with Blue Circle 2 and Blue Circle 3 layers

Activate light pink circle layer

Open paper 5, copy and paste as a new layer, invert and delete, select none and merge down

Activate bright pink circle 1 layer

Open paper 8, copy and paste as a new layer, invert and delete, select none and merge down

Repeat with bright pink circle 2 & arrows layer

***Remember to save often***

Activate light pink circle

Paste tube of choice, duplicate, hide from view the duplicate

Back on the first tube, invert and delete, merge down

Now un-hide duplicate copy, move it up in the layers just below the word-art back layer

Take your eraser and erase any part of the tube that seems out of place, use my tag as example

***Remember to save often***

Activate left black square layer

Copy and Paste close up of tube, invert and delete

Duplicate this layer

One first layer, change blend mode to Luminance(L) and Obacity to 68%

Now on duplicate layer, change blend mode to Screen and Obacity to 72%

Repeat with the Right black Square

***Remember to save often***

Activate kandi word art layer

We are going to flood fill it with 2 different colors

First, to the word STUPID itself, flood fill white

To do this, make the entire canvas larger, try viewing it at 120

Then click on the letters themselves, making them white

Then on the lines above and below, color them black

***Remember to save often***

Now it's time to add the elements, use my tag for placement

Open crome leaf 2, Paste it as a new layer just below the tube layer

Open Heart Lock, Re-size by 15%, copy and paste as a new layer

Open Ribbon 1, Re-size by 50%, copy and paste as a new layer

Open Bow 2, Re-size by 25%, copy and paste as a new layer

Now add any other elements you might like

***Remember to save often***

Crop your image, so that you are getting ride of all excess canvas

Re-size your image so that it is no longer than 650 on it's longest side

Now add your copyright

Save image as a png file.
------------------------------------------------------------------------------
------------------------------------------------------------------------------
This tut was written on March 17, 2013
All links were active at time of posting.
I would love to see your finished work.
Email: lostdarkangel13@gmail.com
If any problems arise please contact me, thanks again.
------------------------------------------------------------------------------
------------------------------------------------------------------------------

Thursday, March 14, 2013

:||: Good News - New CT :||:

Good Morning Mania Stalkers.

Got some good news for you guys.
I've joined another CT team.
This time it's a store.
So look forward to lots of new tuts.


*************************************************

:||: PTU - Peppermint Winter :||:

------------------------------------------------------------------------------ ------------------------------------------------------------------------------
For full size click the above tag.
This tutorial was written with a knowledge of PSP.
Any similarities to any other tutorial are purely accidental and not intentional.
Please do not copy or post on another site without permission.
------------------------------------------------------------------------------ ------------------------------------------------------------------------------
Supplies Needed:

Tube of choice: However I am using Lia
Her work is currently FTU - Visit her website HERE

Template: Naughty or Nice Temp by Jenny @ Creative Misfits Blog
Visit there blog - HERE

Kit: Peppermint Wishes by Sarah's Tags n Things
Visit her blog HERE for Purchase detail

Font - Dr Carbfred
------------------------------------------------------------------------------ ------------------------------------------------------------------------------
***Remember to save often***

I've had this temp for a pretty long time. So not sure if it's still available or not.

Open temp and Control D to duplicate the image

Change the canvas size to 900 x 900, I like to have a lot of extra room and will re-size later

Now we are going to be deleting a lot from the temp.

Let's delete the following layer: Text background; Text; Snowflakes & Copyright

Activate Rectangle Frame Red

Change Foreground to #b60708 and Background to #e6e6e6

Create Gradient using the following number


Insert a new layer and flood fill it with gradient you just created

Now delete the Rectangle Frame Red layer

Delete BG Text. There are a couple of ways to create text fills, however my plugins don't work so I made it the old fashion way.

Replace the Naughty n Nice word fill with the Pepper Winter one below


Right click and save this image

Merge layer down so it gets the soft light look

***Remember to save often***

Open paper 6

Activate Right Frame layer, copy and paste Paper 6, invert and delete

Delete Original Right frame layer and merge the new layer to the old layer

Now repeat with Left Frame layer

Open tube of choice.

Copy and paste as a new layer

I re-sized by 75% to get the girl a little smaller.

Activate Right Frame

Copy and paste tube; invert and delete

Change blend mode to screen

Repeat with Left frame, you will have to flip the tube

***Remember to save often***

Now time to add elements of choice

Open element 40

Activate Raster Layer 1 (the one below the pixel text)

Copy and paste as a new layer, invert and delete

Open Element 13, re-size by 50%

Copy and paste as a new layer, use my tag for placement

Open element 15, re-size by 25%

Copy and paste as a new layer, use my tag for placement

Open element 31, re-size by 50%

Copy and paste as a new layer, use my tag for placement

***Remember to save often***

Crop the image around tag. Make sure it's not longer than 650 on the longest side

Now add your copyright

Add anything else you would like

Save image as a png file.
------------------------------------------------------------------------------ ------------------------------------------------------------------------------
This tut was written on January 27, 2013
All links were active at time of posting.
I would love to see your finished work.
Email: lostdarkangel13@gmail.com
If any problems arise please contact me, thanks again.
------------------------------------------------------------------------------ ------------------------------------------------------------------------------
*************************************************

Friday, March 8, 2013

:||: Lost Is BACK!!! :||:

Hello to all my stalkers.
First and foremost, thank you for all sticking around.
I've done a lot of thinking. Trying to decide what to do.
So much has been going on, in and out of the PSP world.
Some of it I don't like, but then again that's in every world.

So what will I do, hmmmmm.
I love PSPing too much to give up.
That being said, Lost is BACK!!!!!!!!!!!

What does that mean for you, you ask
MORE!!!!!!!!!!!!!
More tuts, More Kits, lots of goodies

All I'm asking is that each visitor take a moment and please vote for me.
The link can be found in the right column.

Can't wait to get started either.
Will be looking for new CT to join as well.

*************************************************

Friday, November 23, 2012

:||: PTU - I Live For Fall :||:


------------------------------------------------------------------------------
------------------------------------------------------------------------------
For full size click the above tag.
This tutorial was written with a knowlege of PSP.
Any similarities to any other tutorial are purely accidental and not intentional.
Please do not copy or post on another site without permission.
------------------------------------------------------------------------------
------------------------------------------------------------------------------
Supplies Needed:

Tube of choice
However I am using Pinup toons
When I purchased this tube they were at CILM however you can now find them at CDO
Please DO NOT use without a proper License

Template: Fall Template from Melissaz Creations
Visit her blog - HERE

Kit: Harvest Time from Sarah's Tags N Things
Vist her blog HERE for Puchase detail

Mask: Mask 125 from Wee Scots Lass Creations
You will have to scroll down and look in the right hand coloum for the link to download

Font - Applejuiced
------------------------------------------------------------------------------
------------------------------------------------------------------------------
Open template, Ctrl D to duplicate, delete original
* Remember to save your work often *

Hide background layer and change canvas size to 900 x 900
We will re-size later, I like to work with a large canvas

Highlight Raster 2 Layer, Open Paper 3
Copy and paste as a new layer, invert and delete, select none & merge down

Repeat steps with Merged Layer

Highlight Raster 3 Layer, Open Paper 2
Copy and paste as a new layer, adjust paper palcement to your preference, invert and delete, select none & merge down

Repeat steps with Raster 6 Layer

Merge Raster 4 layer and Copy Raster 4 layer together & Highlight it
Open paper 7, copy and paste as a new layer, invert and delelte, select none & Merge down

Repeat that with Raster 5 layers and use Paper 4 this time

* Remember to save your work often *

Highlight Raster 10 layer, copy and paste tube of choice, invert and delelte
You'll then have the tube inside the rectangle square
Change the mode to Luminance(L) and the opitacy to 66

Now duplicate the layer and move it to the right a bit, using my tag as example
Repeat until you have 3 tubes in the rectangle, merge the 3 layers together

Repeat the same thing with Raster 6 layer, some deleting will need to be done
Use my tag as example

Now add tube, position it sort of off centered to the left a tad

Hightlint the Merged layer that says I live for Fall
Open paper 6, copy and paste as a new layer, invert and delelte, select none & merge down

Repeat with the other wordart layer

* Remember to save your work often *

Open element 15, re-size by 50%, copy and paste as a new layer
Use my tag for example of placement, apply drop shadow of choice

Open element 31, re-size by 50%, copy and paste as a new layer
Use my tag for example of placement, apply drop shadow of choice

Open element 4, re-size by 25%, copy and paste as a new layer
Use my tag for example of placement, apply drop shadow of choice

Open element 8, copy and paste as a new layer, I used it twice on my tag
Use my tag for example of placement, apply drop shadow of choice

Open element 30, re-size by 50%, copy and paste as a new layer
Use my tag for example of placement, apply drop shadow of choice

Now, open Paper 3 again, copy and paste as a new layer to the very bottom of the layers
This is the layer you will be applying the mask to
Once done, you will need to adjust so that you can see the edges of the mask around the main images of the tag

If the tag is to your liking, crop around the image getting rid of all excess
Re-size to no longer than 650 on the longest side

Now add your copyright

Add anything else you would like

Save image as a png file.
------------------------------------------------------------------------------
------------------------------------------------------------------------------
This tut was written on November 23, 2012
All links were active at time of posting.
I would love to see your finished work.
Email: lostdarkangel13@gmail.com
If any problems arise please contact me, thanks again.
------------------------------------------------------------------------------
------------------------------------------------------------------------------

*************************************************

Tuesday, October 23, 2012

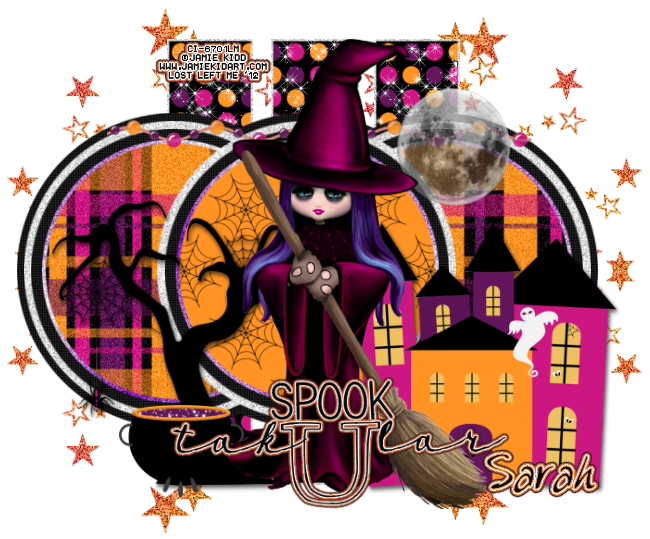
:||: PTU TUT - Spooktakular :||:

Photobucket

------------------------------------------------------------------------------
------------------------------------------------------------------------------
For full size click the above tag.
This tutorial was written with a basic knowlege of PSP.
Any similarities to any other tutorial are purely accidental and not intentional.
Please do not copy or post on another site without permission.
------------------------------------------------------------------------------
------------------------------------------------------------------------------
Supplies Needed:

Tube of choice - However I am using Jamie Kidd
Please DO NOT use without a proper License
I purchased this tube while she was at CILM but you can now find her at CDO HERE

Template: Template 166 by Punky Butts
Visit her blog - HERE

Kit: Booga Booga by Sarah's Tags N Things
Visit her blog HERE for Puchase detail

Word-art: Halloween Word Art
Visit DigiScrapDepot and they will tell you have to download HERE

Font: Especial Kay


Plugins: Gradiant Glow
------------------------------------------------------------------------------
------------------------------------------------------------------------------
So we have all the parts collected? Let's get started shall we.

Make sure you save your progress though out this just in cause anything happens.

Open the template, CTRL-D to duplicate, close orginal

Re-size template down to 650 x 650

Re-size canvas to 900 x 900, don't worry we will re-size it later. I like a large canvas to work on.

Open paper2

Select left rec, Copy and paste paper, Invert and delete, Merge down

Repeat to center rec and right rec

Open paper8

Select Purple circle left, Copy and paste paper, Invert and delete, Merge down

Repeat to purple circle right

Open paper 7

Select purple circle center, Copy and paste paper, Invert and delete, Merge down

Save as a PSD work in progress, to keep from loosing work

Open tube of choice and past as a new layer in the center of your canvas

Open element 36, re-size by 50%, copy and paste as a new layer, use my tag for placement

Open element 38, re-size by 50%, copy and paste as a new layer, use my tag for placement

Open element 33, copy and paste as a new layer, duplicate and then mirror. Position the stars so that you'll see it around the edges

Merge together the star layers and duplicate again and this time flip, Position again to your liking, them merge all star layers together

Open element 13, re-size by 25%, copy and paste as a new layer, use my tag for placement

Open element 23, re-size by 25%, copy and paste as a new layer, use my tag for placement

Open element 27, Select left rec, Copy and paste, Invert and delete, Merge down

Repeat to center rec and right rec

Open element 28, re-size by 50%, Copy and paste as a new layer, use my tag for placement

Save as a PSD work in progress, to keep from loosing work

Open wordart spooktakular, re-size by 10%

Apply the following Gradient Glow

Photobucket

Now add your copyright

Add anything else you would like

Re-size total image so that it's no longer than 650 on it's longest side

Save image as a png file.
------------------------------------------------------------------------------
------------------------------------------------------------------------------
This tut was written on October 23, 2012
All links were active at time of posting.
I would love to see your finished work.
Email: lostdarkangel13@gmail.com
If any problems arise please contact me, thanks again.
------------------------------------------------------------------------------
------------------------------------------------------------------------------

*************************************************

Saturday, October 13, 2012

:||: Howdy :||:

-sneaks in-
Hello Mania Stalkers!!!
Hope each and everyone of you guys are doing great.
Things my way are doing better, Finally!!!
 
You guys will notice I just posted 3 PTU now FTU kits.
I tried going PTU but it didn't work for a variety of reasons.
Since none of them sold any I decided to make them available for free.
Same thing applies for them that do for any of kit I have.

If you use anything of mine please share I would love to see them. :)
lostdarkangel13@gmail.com

While your here don't forget to vote for me. 


*************************************************

:||: Fright Night - PTU now FTU Kit - TS :||:


Another kit from the Mania!!!
Last of my PTU kits for right now. Unless things change I won't be PTU again.


Photobucket


This kit is a Halloween kit.
Includes 58 elements & 30 papers.
Drop Shadow on Prv only.
Tagger's Size

Click the preview to download.

--------------------------------------------------
--------------------------------------------------


*************************************************


:||: Happy Halloween - PTU now FTU Kit - TS :||:


Another kit from the Mania!!!
Was PTU but now FTU - ENJOY!!!

Photobucket

This kit is a Halloween kit.
Includes 67 elements & 24 papers.
Drop Shadow on Prv only.
Tagger's Size

Click the preview to download.

--------------------------------------------------
--------------------------------------------------

*************************************************


:||: Fight Like A Girl - PTU now FTU KIT - TS :||:


 Since my first try at PTU didn't work and never actually sold anything, I am making my only 3 PTU kits into Freebies. First one up is my Breast Cancer Awareness kit.

Photobucket

This kit is a Breast Cancer Awareness kit.
Includes 47 elements & 18 papers.
Tagger's Size

Click on preview to download

--------------------------------------------------
--------------------------------------------------


*************************************************


Thursday, September 20, 2012

:||: PTU - Natural Woman :||:

Photobucket
------------------------------------------------------------------------------
------------------------------------------------------------------------------
For full size click the above tag.
This tutorial was written with a knowledge of PSP.
Any similarities to any other tutorial are purely accidental and not intentional.
Please do not copy or post on another site without permission.
------------------------------------------------------------------------------
------------------------------------------------------------------------------
Supplies Needed:


Tube of choice - However I am using Keith Garvey
Please DO NOT use without a proper License
I purchased this tube while he was at MPT, however he now has his own store
Visit his store HERE, to purchase


Template:
Vix Template 18 - Visit her blog HERE


Kit:
Abbey Dawn by Missy
Visit her Store HERE for Puchase detail


Font - Seasons-Spring


Plugins - Xenofex 2 Constellation & Gradient Glow
------------------------------------------------------------------------------
------------------------------------------------------------------------------
Open template, Ctrl D to duplicate temp, close copyright layer

Re-size canvas to 900 x 900, I like having a large workspace, we will re-size smaller later

Open paper 9

Select Background to Colour layer, copy and paste paper 9 as a new layer, invert and delete

Change blend mode to soft light, merge down

Select Circle layer, copy and past paper 9 as a new layer, invert and delete

Change blend mode to Hard light, merge down

Select rectangle layer, flood fill with a color of choice, I used #bd0461

While the layer is still selected, apply Xenofex 2 Constellation

Use the following settings
Photobucket

I chose a tube where the girl kneeling, it gave me the look I was wanting.

Place your tube of choice below the wordart layers

Open 71, copy and paste as a new layer, move this layer to the bottom layer on the canvas

Open 1, re-size by 50%, copy and paste as a new layer, use my tag for placement

Open 27 & 26, re-size both images, now take and copy 26 onto 27

Change 26 blend mode to Dodge and Opticy down to 62, merge the two layers together

Apply Gradient glow using the following setting
Photobucket

Now copy and paste this below wordart layer

Open 25, re-size by 25%, copy and paste as a new layer, use my tag for placement

Open 20, re-size by 25%, copy and paste as a new layer, use my tag for placement

Open 73, re-size by 60%, copy and paste as a new layer,

Duplicate and mirror, Merge the two layers together and send to bottom

Crop image down to size, then re-size so that it's no longer than 650 on the longest size

Add anything else you would like

Now add your copyright

Save image as a png file.
------------------------------------------------------------------------------
------------------------------------------------------------------------------
This tut was written on September 20, 2012
All links were active at time of posting.
I would love to see your finished work.
Email: lostdarkangel13@gmail.com
If any problems arise please contact me, thanks again.
------------------------------------------------------------------------------
------------------------------------------------------------------------------


*************************************************

Friday, July 27, 2012

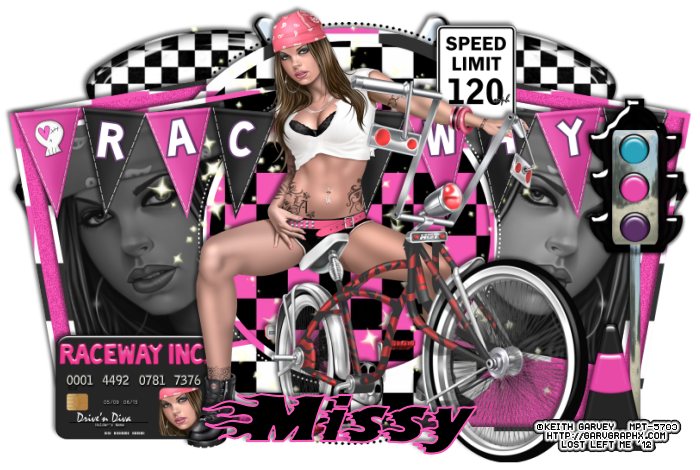
:||: PTU - Racin Girl :||:

Photobucket
------------------------------------------------------------------------------
------------------------------------------------------------------------------
For full size click the above tag.
This tutorial was written with a knowlege of PSP.
Any similarities to any other tutorial are purely accidental and not intentional.
Please do not copy or post on another site without permission.
------------------------------------------------------------------------------
------------------------------------------------------------------------------

Supplies Needed:

Tube of choice: However I am using Keith Garvey, I purchase this tube from MPT.
He is currently at PTE however with their closing he is going independent as of September 1
I will update links when the time comes
Please DO NOT use without a proper License 

Template: Punky Butts Temp 132
Visit her blog = HERE

Kit: Racin Girl Style by Missy @ SWA
Vist her blog HERE for Puchase detail

Font=Blazed

Plugins=Frittllary 
------------------------------------------------------------------------------
------------------------------------------------------------------------------
Open template, Shift D and close orginal

We are going to change the canvas size, I prefer working with a lot of room. We will re-size later.

Go to Image, Canvas size, change it to 900 x 900

Ok, now we are ready.

Remember to save your work as a psd file through out. This will allow you to start back there with the layers in tact if your PSP should close.

Locate and delete the following layers
-Credits
-Wordart - Wicked
-Wordart - Intentions
-Pixel wordart - Wicked Intentions

Highlight the left large square frame layer

Open Paper 10, copy and paste as a new layer, Invert & delete, select none, Delete orginal layer and merge down

Now repeat that with the following layers
-Right large square frame
-Left Rec frame
-Right rec frame
-Large Circle frame
-Left Square frame
-Right Square Frame
-Small circle frame
(You will notice that was all the purple layers)

Open your close up on your tube of choice

Hight the left square layer

Copy and paste your closeup as a new layer, adjust to your preference, invert and delete, select none

Duplicate, Mirror, Merge down

Use my tag as an example

Change blend mode to Luminance (L) and Opacity to 72%

Hightlight small circle layer, copy and paste paper 15, invert and delete, select none, delelte orginal image and merge down

Hightlight large circle layer, copy and paste paper 16, invert and delete, select none, delelte orginal image and merge down

Using a color of choice, I used #f658b5, Flood fill the following layers
-Right Large Square
-Left Large Square
-Right Rec
-Left Red

Now apply Frittllary to the above layers using the below settings

Photobucket

Copy and past tube of choice, position in in the center of tag, use mine as an example

Open Element 31, Shift D to duplicate, close orginal

Using your magic wand tool click inside the wide square

Copy and paste close up of tube of choice, invert and delete, merge down, select none, Resize by 25%

Copy and paste the card below main tube, use mine as an example

Use my tag as an example of the placement on the following elements.

Open Element 8, copy and paste as a new layer

Open Element 70, resize by 15%, copy and paste as a new layer

Open Element 18, resize by 50%, copy and paste as a new layer

Open Element 28, resize by 25%, copy and paste as a new layer

Open Element 23, copy and past as a new layer, move to the bottom layer

Open Element 43, resize by 75%, copy and paste as a new layer

Make sure your main tube layer is at the very top. Rearrange layers if you need to.

Now take a moment and apply a drop shadow to layers of choice, make sure you get at least the frame and tube layers

Add anything else you would like

Re-size total image so that it's no longer than 700 on it's longest side

Now add your copyright

Save image as a png file.
------------------------------------------------------------------------------
------------------------------------------------------------------------------
This tut was written on July 27, 2012
All links were active at time of posting.
I would love to see your finished work. 
Email: lostdarkangel13@gmail.com
If any problems arise please contact me, thanks again.
------------------------------------------------------------------------------
------------------------------------------------------------------------------


*************************************************


Thursday, May 31, 2012

:||: Another Voting Award :||:


I am so please to say that on my birthday, May 29th I received this award.
That is awesome. I have had 300 votes. TY to everyone. :)
   
Photobucket


So now that I have the Pewter award, lets shoot for the Bronze at 1000 votes.
So remember, check back daily to vote. Thanks again everyone.

--------------------------------------------------
--------------------------------------------------


*************************************************
/center>


Saturday, April 7, 2012

:||: PTU - Easter Eggs :||:


Photobucket
------------------------------------------------------------------------------
------------------------------------------------------------------------------
This tutorial was written with a knowlege of PSP.
Any similarities to any other tutorial are purely accidental and not intentional.
Please do not copy or post on another site without permission.
------------------------------------------------------------------------------
------------------------------------------------------------------------------
Supplies Needed:

Tube of choice: However I am using Elias Chatzoudis
Please DO NOT use without a proper License
Visit PTE - HERE, to purchase

Template: Ella's Easter Temp 4 from the Misfit Blog
Visit their blog - HERE

Kit: Easter Eggs by Scrappin Krazy Designs
Vist her blog HERE for Puchase detail

Font - CluKennedySH

Plugins - Gradient Glow
------------------------------------------------------------------------------
------------------------------------------------------------------------------
Open template, Shift D, Close orginal

We are going to change the canvas size, I prefer working with a lot of room. We will re-size later.

Go to Image, Canvas size, change it to 900 x 900

Ok, now we are ready.

Remember to save your work as a psd file through out. This will allow you to start back there with the layers in tact if your PSP should close.

Hide the eggs that are in the temp, we are going to replace those with the kit ones a little later.

Highlight Bg 1 layer

Open p14, copy and paste as a new layer, invert and delete, select none and merge down

Highlight Bg3 layer

Open p06, resize by 50%, copy and paste as a new layer, reposition to your liking, invert and delete, select none and merge down

Highlight Bg 2 layer

Open 04, copy and paste as a new layer, invert and delete, select none and merge down

Highlight Easter WA layer

Open p05, resize to 700 x 700, copy and paste as a new layer, reposition to your liking, invert and delete, select none and merge down

Now lets take a moment to apply a little Drop shadow to a few layers.

Using the following settings, apply a drop shadow to Frame 3, Frame 2, Frame 1 & WA BG layers

Photobucket

Now add your tube of choice, place it below the wordart layer

Now duplicate your tube and more the copy above the wordart layer

Now you might want to increase the size of your picture so that you can see the very small details

Below will show the overview size of 300

Photobucket

Using your earser at 5, trace the outline of your tube

Once you have done this you can increase the earser size and delete any other portion of the tube that is blocking the wordart

What you want is the main part of the tube behind the wordart with only the hands in front, use my tag as an example

Now open 3 eggs of your choice

Re-size each by 65%, then copy and paste one at a time

We are going to replace you template eggs with these, delete the other ones

Open ele 23 and place it below your tube, using my tag as an example

Open ele 32, copy and paste as a new layer, mirror and move to your liking

Apply a drop shawdow using the settings above.

Open ele 09, copy and paste as a new layer, move to very bottom

Apply any other element of your chosing.

When done, crop your image and then re-size so that the longest side is less that 700

Now add your copyright

Save image as a png file.
------------------------------------------------------------------------------
------------------------------------------------------------------------------
This tut was written on April 7, 2012
All links were active at time of posting.
I would love to see your finished work.
Email: lostdarkangel13@gmail.com
If any problems arise please contact me, thanks again.
------------------------------------------------------------------------------
------------------------------------------------------------------------------

*************************************************


Sunday, April 1, 2012

:||: Misfit Bunny Trail :||: NEW FTU KIT - A CM Blog Challenge :||:


As part of the Easter/Spring Theme Scrapkit challenge. Below you can see my preview. Please take a moment and mosey on over to the Creative Misfits Blog and take a look at the other kits. You can download it from their blog.

ENJOY!!!!!!!!

Photobucket
--------------------------------------------------
--------------------------------------------------


*************************************************

Tuesday, March 27, 2012

:||: My First 1Award Award :||:


Sooo I would like to give each and everyone of my fans a HUGE TY.
I recieved this this AM. This means that I've had 100 votes for my blog. YAY!!!

Photobucket

So now that I have the copper award, lets shoot for the Pewter at 300 votes.
So remember, check back daily to vote. Thanks again everyone.

--------------------------------------------------
--------------------------------------------------


*************************************************